

In the last two blogs, we looked at installing the Copilot Agent Kit and then we spent time configuring the Agent Kit. Now both of the foundational steps have been done, we can start to dive into the features the kit provides, starting out with the Agent Inventory.
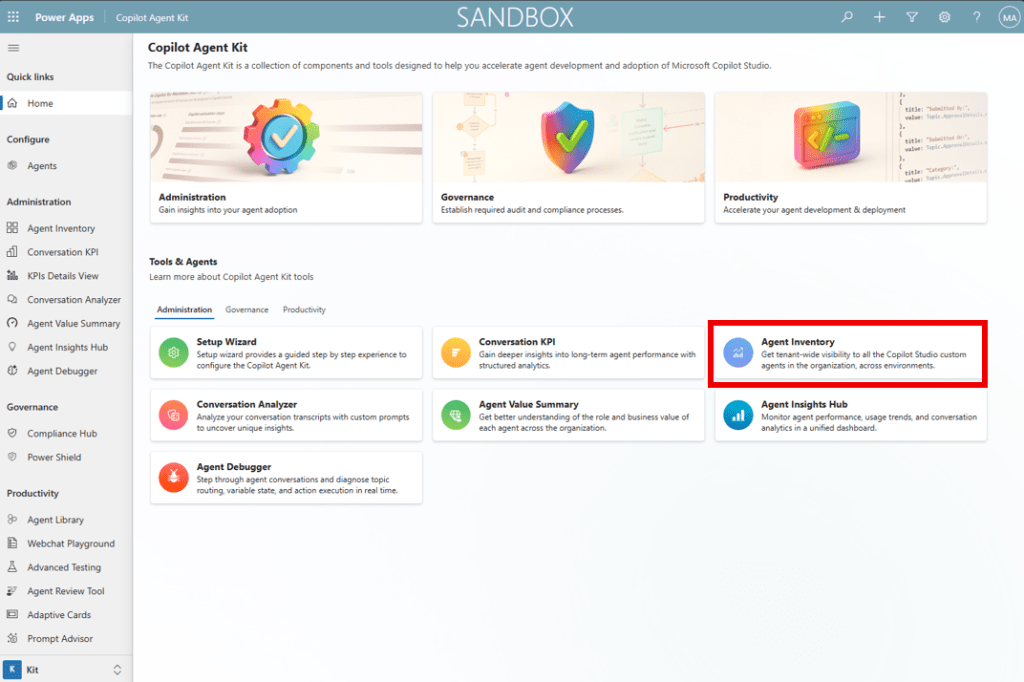
The official documents for Agent Inventory can be found here. This feature gives us a detailed view of all the agents that have been built via Copilot Studio that live within our Power Platform tenant. From this view, we can very quickly see agents across environments, what type of agents they are, their publish status and various other useful bits of information. To access all of this, we’re going to open up the Copilot Agent Kit and click on Agent Inventory from the Home Screen:
This will open your Agent Inventory Dashboard, where you will have a number of statistics surface up immediately. I have this installed in a completely new tenant, so the numbers shown here are small. The official documentation will show a dashboard with a larger subset of data. To refresh the data, click on the Sync Agents button in the top right corner. A notification will pop up to advise the sync has started.
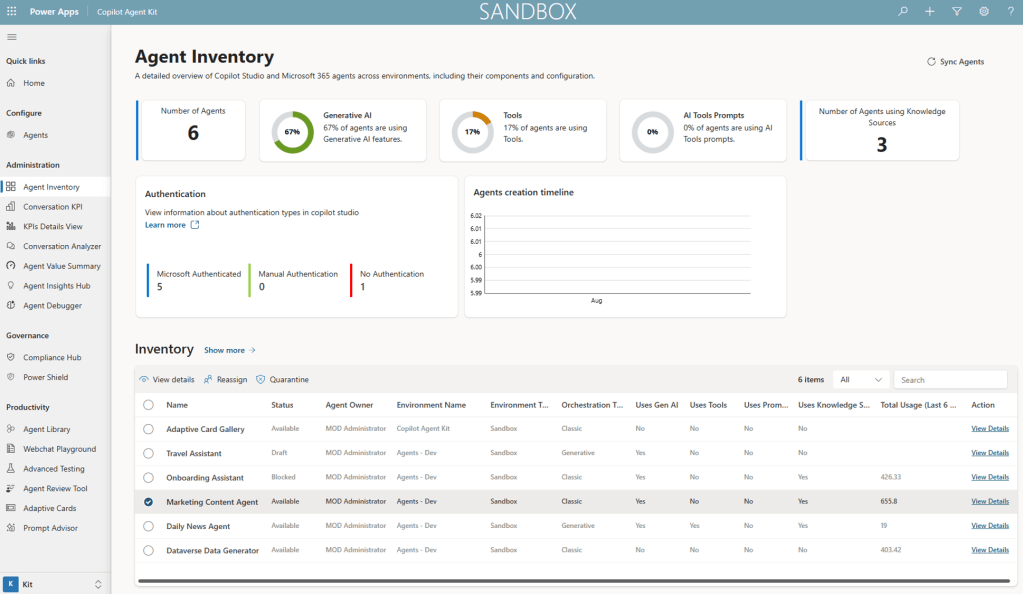
Note: At the time of writing this blog, the update to highlight which agents had been built using the new GitHub Copilot harness had not yet been released. Once released, this will be reflected under the Orchestration Type Header.
If we look closer at the Inventory Sub grid, we can select one or multiple agents. This will allow us to perform certain actions:
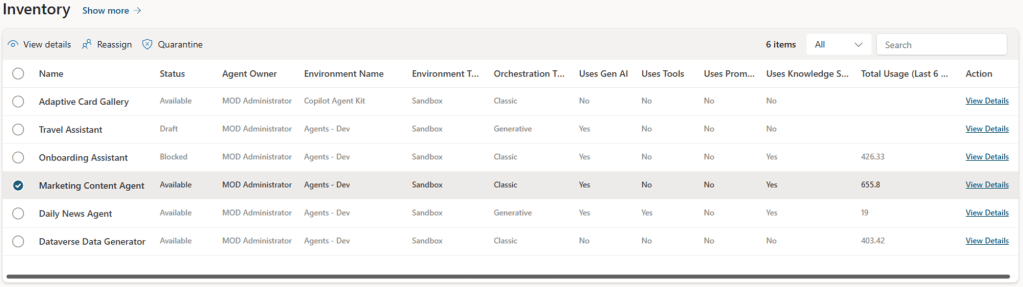
Reassigning an Agent
One of the greatest challenges an admin faces is managing orphaned agents. The Agent Inventory helps us easily tackle this by selecting any agents without an owner in our list and clicking the Reassign button in the ribbon. This will pop up a window and will allow you to search of any user with an M365 licence in your organisation. Once you hit reassign, a flow will run in the background and work its magic for you.
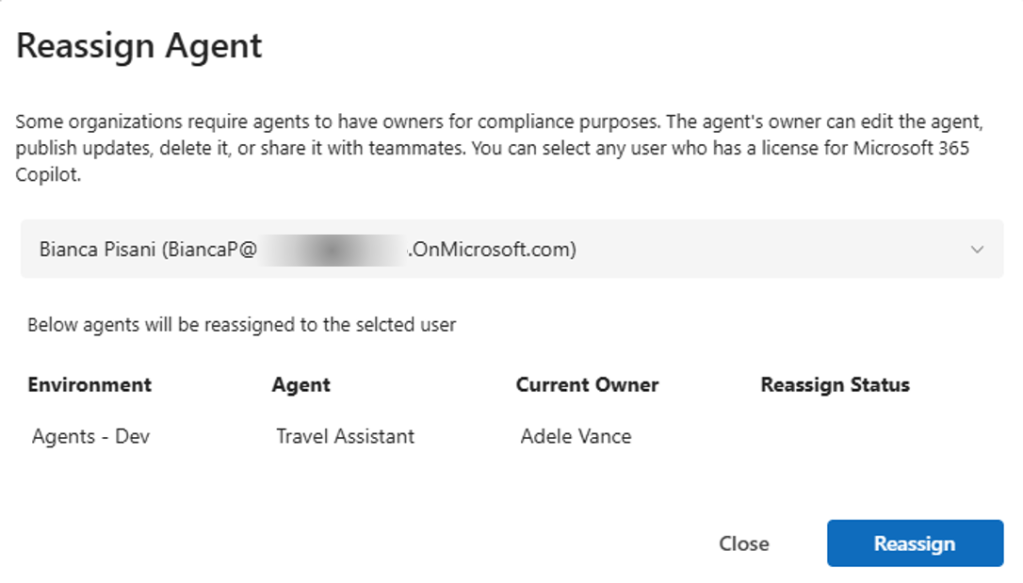
Quarantining an Agent
We can quarantine any agents that we don’t recognise, are running up an unexpected high cost or we want to take a closer look at. Only available agents can be Quarantined. Quarantining an agent will change its status to blocked, making it no longer accessible. You can quarantine multiple agents at the same time. To quarantine an agent or agents, select them from the list and click the Quarantine icon from the ribbon. Once you have confirmed you wish to quarantine the agent(s), you will see a confirmation screen like the one below:

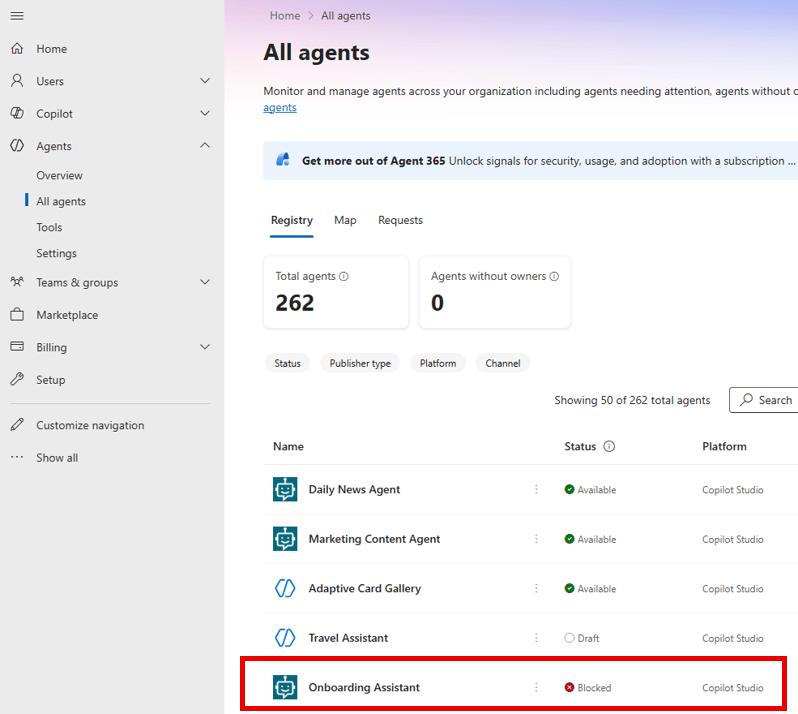
If I navigate to my M365 Admin Center, I can now see that my Onboarding Assistant is showing as Blocked:
To un-quarantine an agent or agents, again select them from the view and the option to Un-Quarantine will appear in the ribbon. The option will only appear if all agents selected are currently quarantined.
View Agent Details
If we open up one of these agents and take a deeper look at the details, we can see a lot more information about them including what kinds of actions the agent has used, how often the agent is being used, what features does the agent have enabled and a breakdown of its knowledge sources, prompts etc.

If we needed to see which agents used these features, we can click on the Show More button beside the word Inventory on the Agent Inventory sub grid. This will show us the classic view of our agents where we can easily filter agents by various categories.

Note: As of the time of writing this blog, any agents built on the new GitHub Copilot harness will not display any descriptions. The CAT team are currently looking at ways of leveraging this field in the future.
If you want to have a look at which flows power the Agent Inventory, they have been conveniently labeled for us:
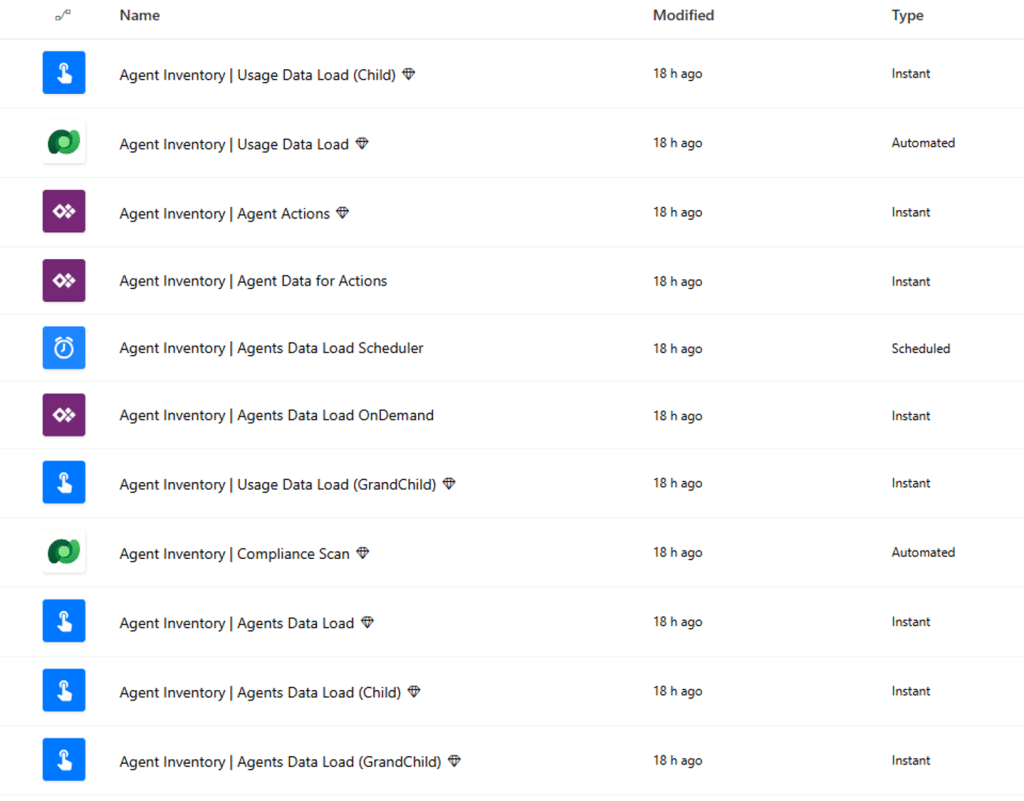
The Agent Inventory | Agents Data Load Scheduler flow ensures the data is refreshed at midnight every night. This can be customised, but note that this will create an unmanaged layer in the environment that stores the customisations. More info about this can be found here.
So that concludes our look at the Agent Inventory. Keep an eye out for our next feature blog on the Copilot Agent Kit!


3 thoughts on “Copilot Agent Kit: Agent Inventory”