

In the previous blog, we looked at all the steps involved in getting the Copilot Agent Kit installed. Now we’re going to run through all the steps to ensure you have it up and running correctly so we can start to take advantage of all the neat tools available to us. These instructions are supplemental to the ones that can be found in the official Microsoft documentation here.
Thankfully, our friends at the CAT team have created a handy Setup Wizard to help us through. To access the wizard, we’ll need to open the main model driven app, which I have highlighted below:
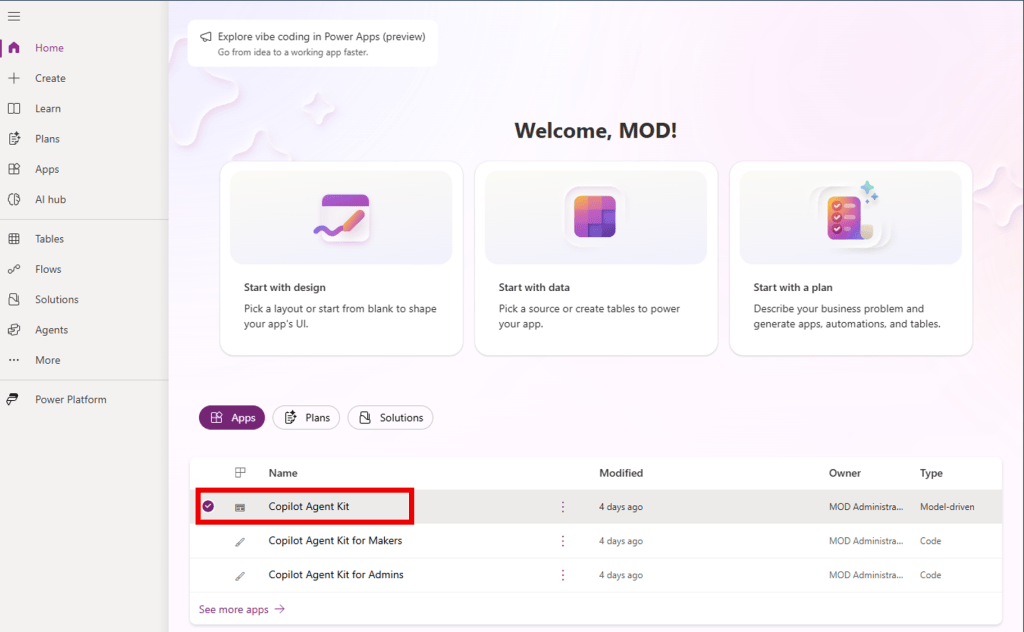
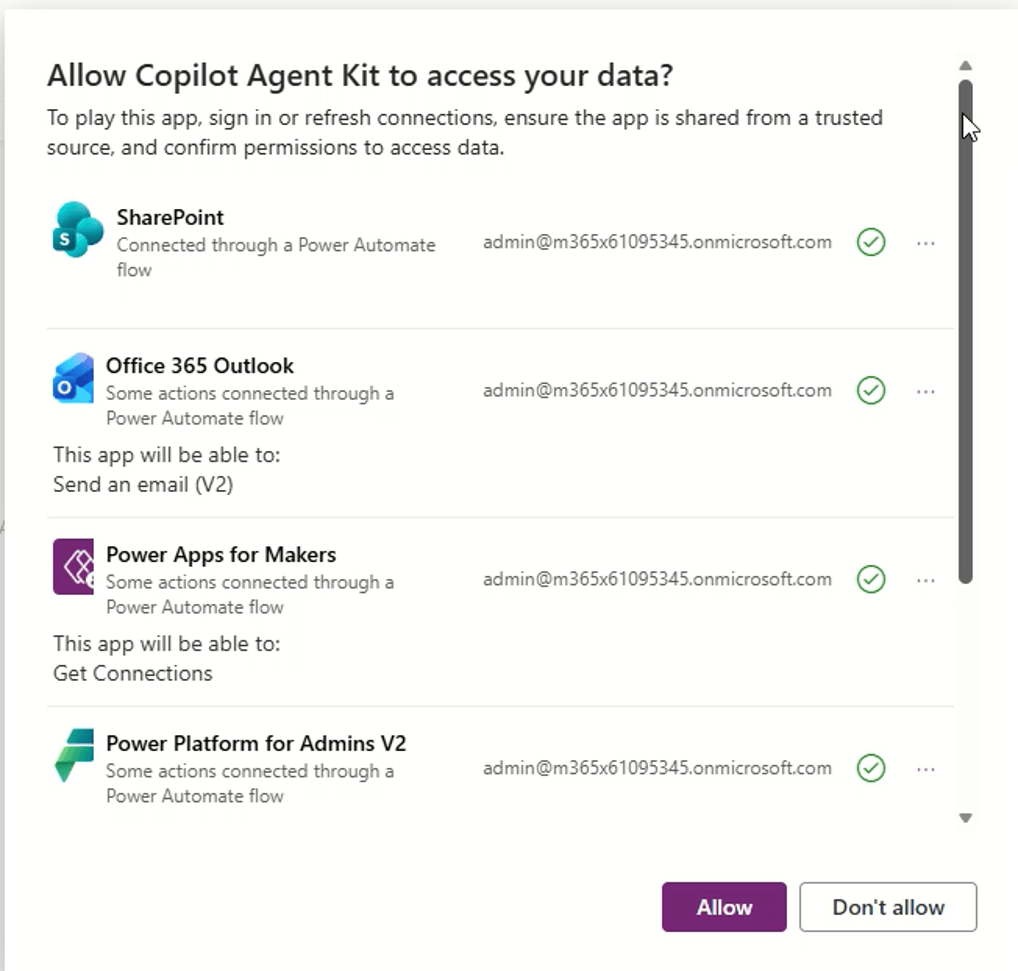
When you open the app for the first time, you will be prompted to approve several connections that allow the app to function correctly. Feel free to scroll through these and when you’re happy with the connections, click Allow.
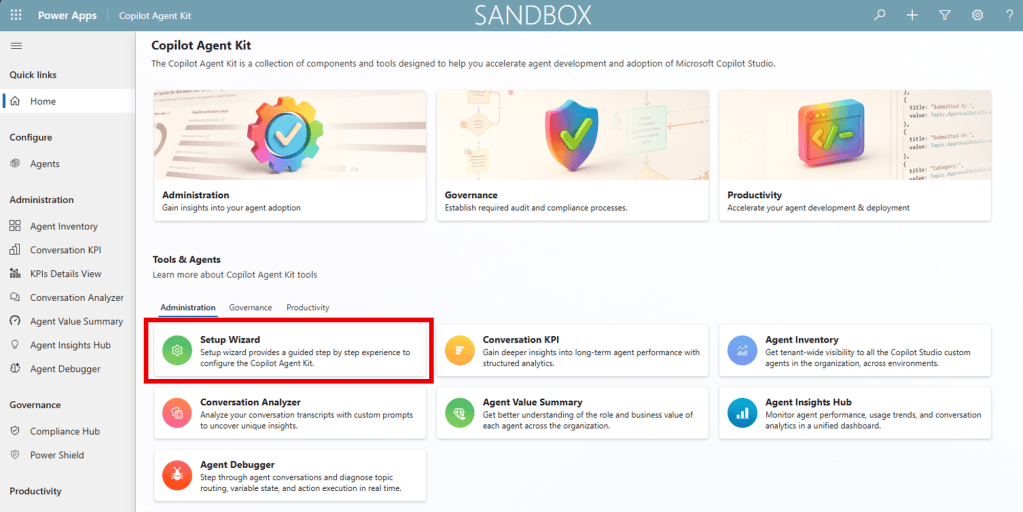
Now we are going to open the Setup Wizard and start configuring the kit to our specific needs. Click on Setup Wizard:
Once opened, we’re going to walk through a series of steps. Starting out with one we have already completed from the first blog – checking the pre-reqs are in place:
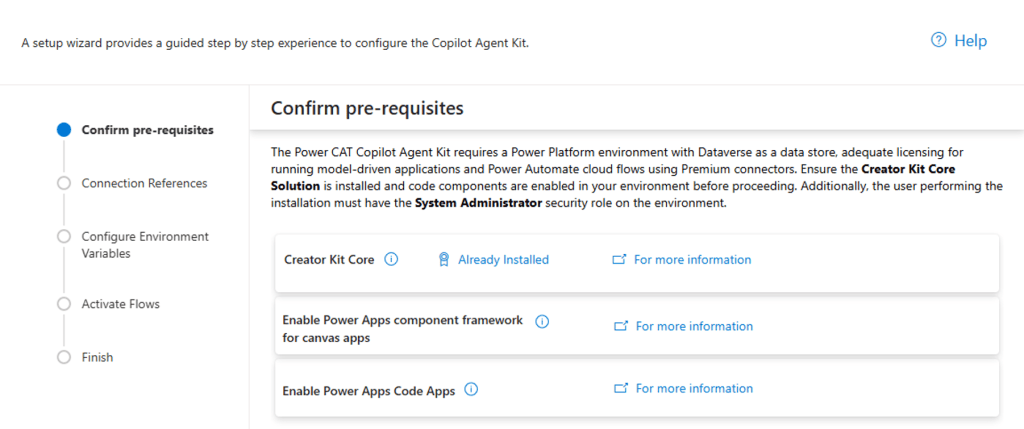
Assuming you followed the first blog, you can click next. If you did not, ensure you have the above requirements in place before proceeding. These have been detailed out in my previous blog.
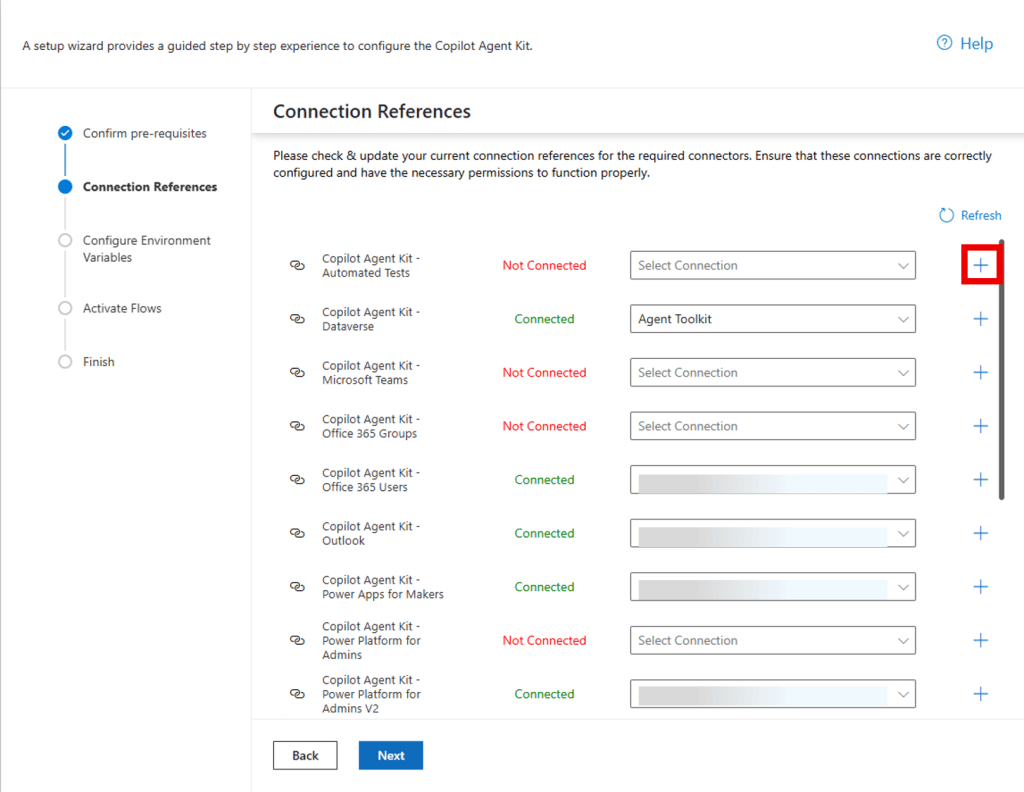
Now we’re going to work our way down and create our Connection References. Thankfully, the CAT folks have put links beside each connection to detail what we’re getting into with these connections. They can also be found here. To create a new connection reference, just click on the + sign:
This will open up a screen to create a new connection reference:
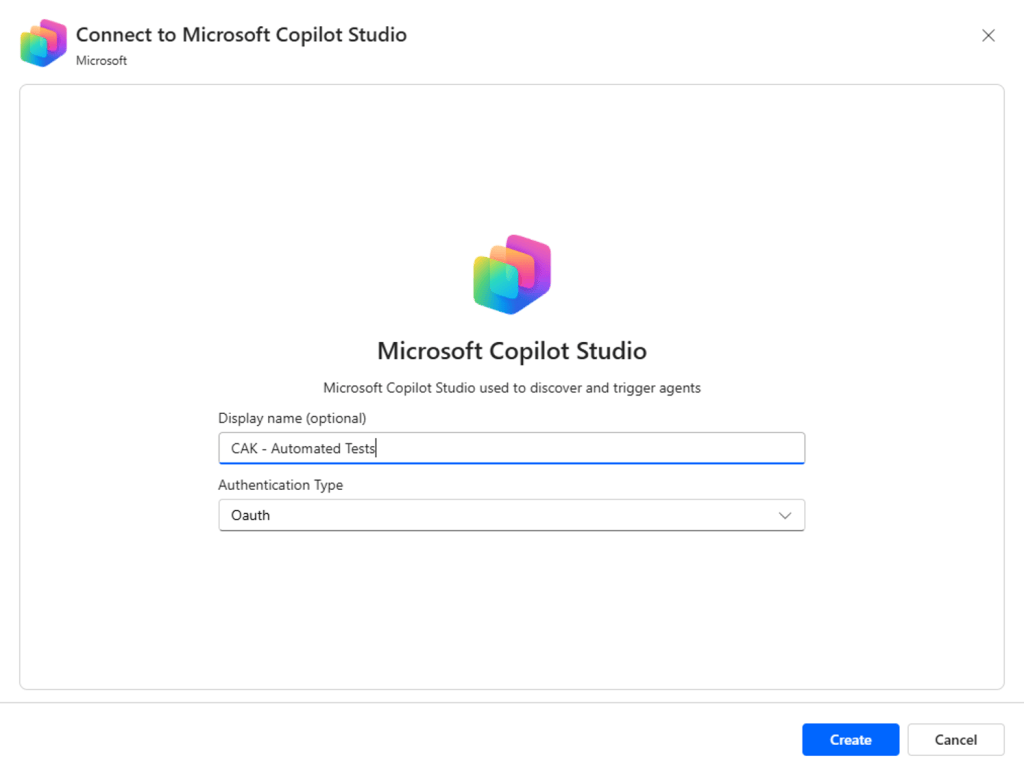
Once created, navigate back to the Wizard, click on the refresh button and you should now see the connection appear. Repeat this until all the connection references have been established.
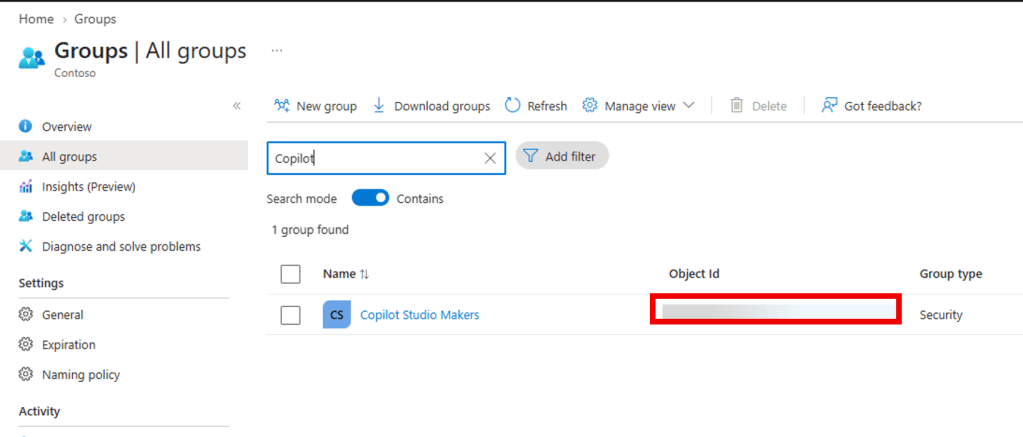
Now we’re going to jump into configuring the Environment Variables. Most of these are self explanatory, but let’s pick on a couple to set up together. First up, we have the Agent Maker Team ID. This is the Object ID of the Entra Team that contains all of your makers that you wish to send a welcome email to. If you were a user of the old Power Platform CoE toolkit, you may recall the maker welcome email that went out. This allows you to configure a similar experience.
Below you can see that I have a group called Copilot Studio Makers. You will copy the value of the Object ID field and paste that into the Environment Variable field for Agent Maker Team ID in the Wizard. Later on, we will look at how to customise the welcome email and turn on the flow.
The Government Admin Alias is the same story as above and allows you to easily manage who receives notifications and approval requests.
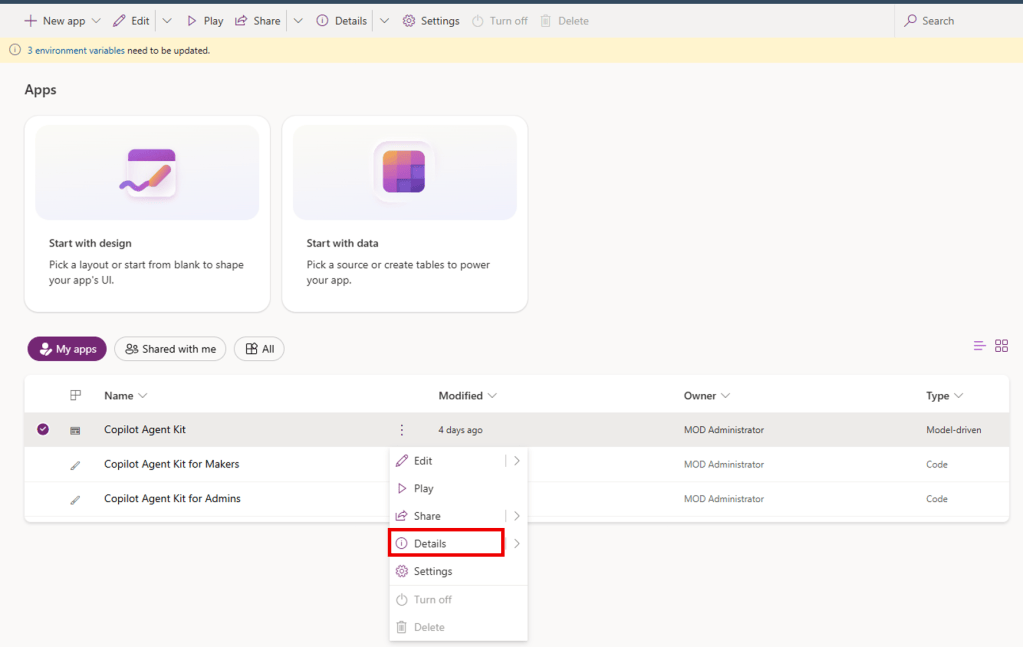
You can find the App ID for the Copilot Agent Environment Variable under the details section for the app:
Next we can move on to Activate Flows. It is recommended to leave flows turned off until you are ready to use a certain feature. In my case, I’m going to start with Agent Inventory, so I will start turning these flows on. Note: you should turn these on in the following order: Grandchild, Child then Parent. Turn them on one by one. Clicking on the flow icon beside the name of the flow will also open the flow in Power Automate.
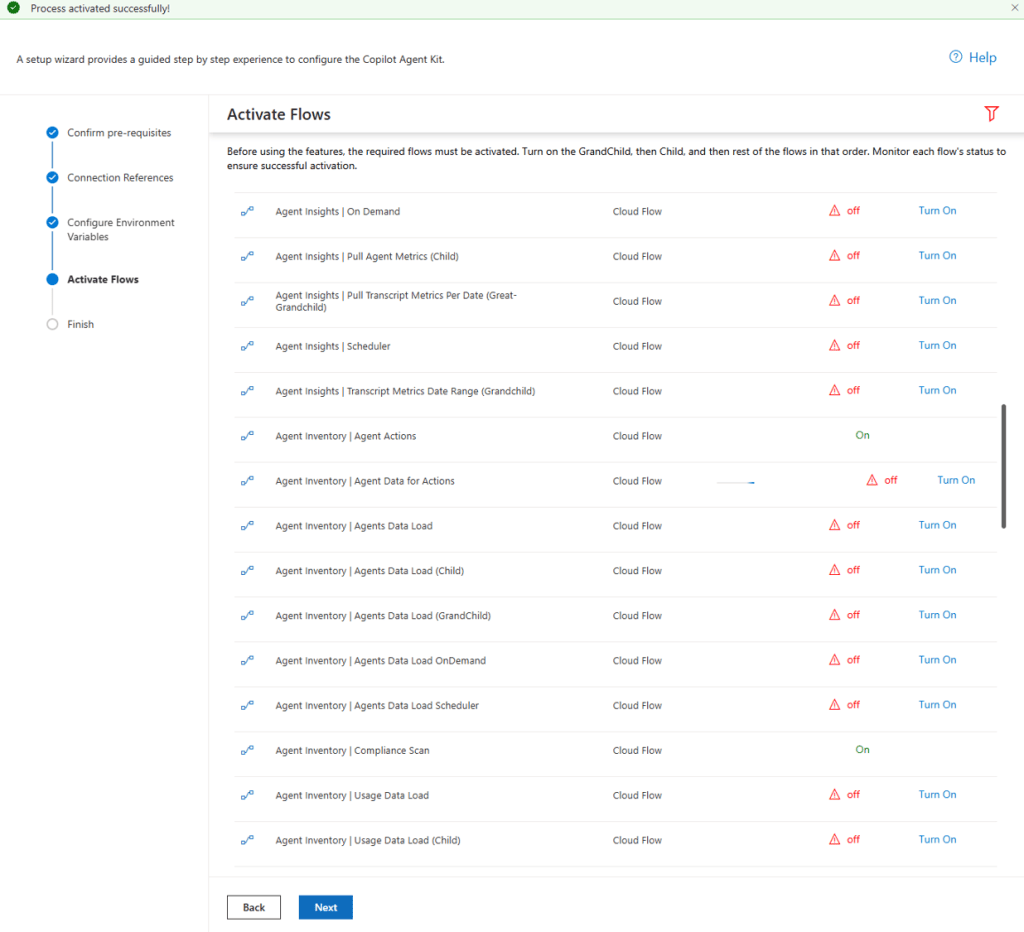
Notice how a progress bar will show when the Turn On button is clicked. Wait for the flow to show as On before moving to the next one. A notification at the top will also indicate the flow has been enabled successfully. We can always come back to the Wizard if we want to turn on/off the other flows. When you’re done, click Next.
And now you are done! We’re all set to start looking at features of the Copilot Studio Kit!


3 thoughts on “How To Configure the Copilot Agent Kit”