

I’ve recently gone back to using Rocketbook to help keep track of my notes, especially now that I am back in Pre-Sales and working with multiple clients on a regular basis.
For those of you not familiar with Rocketbook, it’s a pretty simple but smart product: A reusable notebook that you scan with an app on your phone to automatically upload or email your notes to pre-defined locations. If you only really use one or two locations, this might work well for you, but if you want to have a one stop shop upload that will dynamically know where to send your scan based on the title of the scan, then this little flow is for you. By emailing your scan to yourself, we can use flow to read the from address and subject, then place the scan into the correct OneDrive folder. If the folder doesn’t exist, it will create one for you!
Setting Your Rocketbook Up
First off, we need to set up the scan to email settings on our app. Ensure one of the destinations are set up for an Outlook email address. This is Rocketbook 101 so if you require more assistance, be sure to check out their help article here.

Now we need to customise the title of the email that Rocketbook sends. This is done by creating an Email Subject Template. Again, more info can be found on how to set this up here but we’re basically going to set the subject to the title of the file we’re uploading which is the Filename. Here’s what mine looks like:

Pretty simple! Rocketbook also has this neat built in feature that allows us to dynamically set the title of our note by simply placing it in between two hashtag/pound sign (#) symbols. For the purposes of this blog, I am using the following syntax: ##Folder Name-Title of Note##. You can read more about dynamic titles for Rocketbook here. Here you can see an example in action:
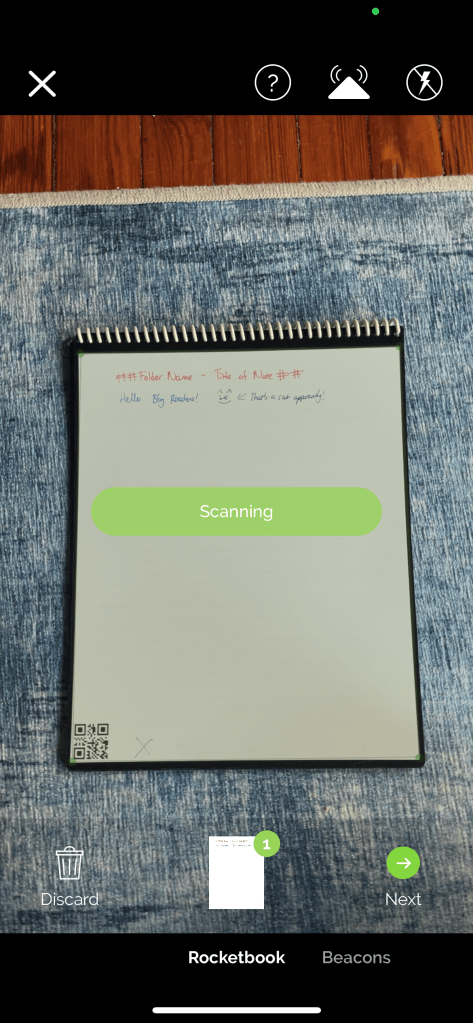

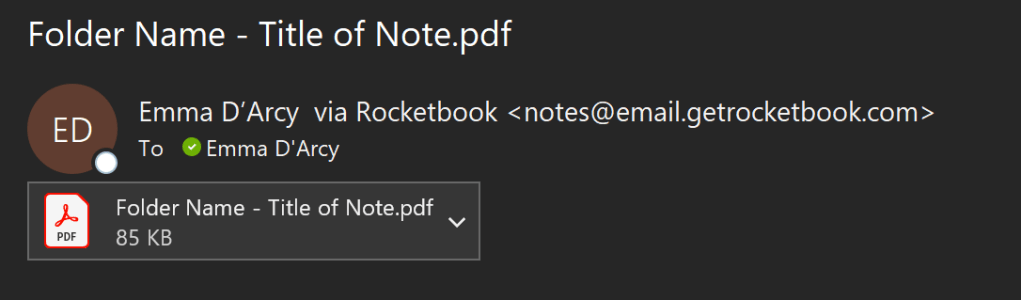
So now when we scan the page via the Rocketbook app, it will come into our inbox like this:
The Fun Stuff: Setting up the Flow
Now Rocketbook is set up, we are going to create a Power Automate Flow that will place the file into the corresponding folder and if a folder doesn’t exist, it will create one for us!
The trigger for our flow is when an email is received from the notes@email.getrocketbook.com address and if there is an attachment in the email:

Since technically an email can have multiple attachments, we need to create an Apply to Each loop, even though in this case it will only be one attachment. Then we will then look at the subject of the received email and parse through to determine the folder name. This is done in a few steps. Since we are using a specific syntax as stated above (Folder Name – Subject), we can say that anything before the ‘-‘ sign is the folder name. So we need to find the index value of ‘-‘. To do this, we will use a simple compose value and the indexOf function:
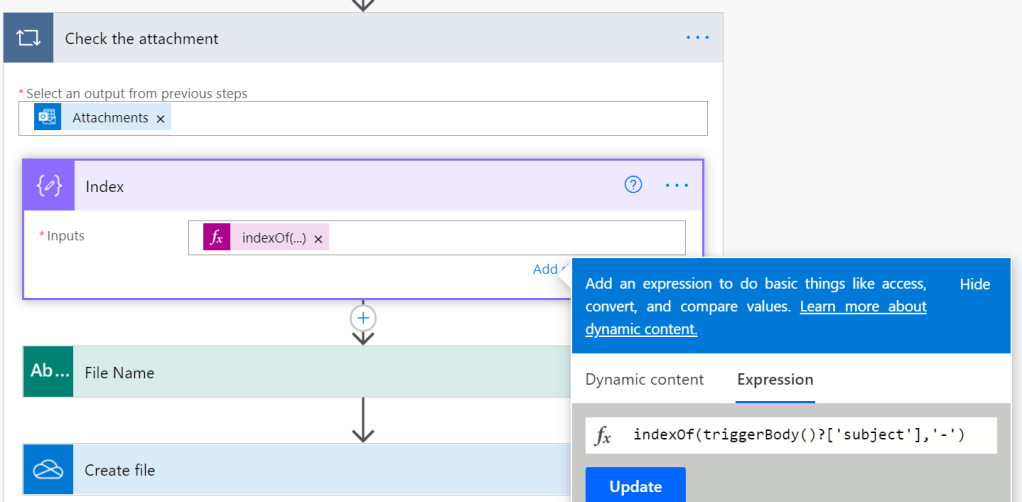
Once the location of the ‘-‘ symbol has been found, we will now use a Substring action to pull out the folder name from the subject:
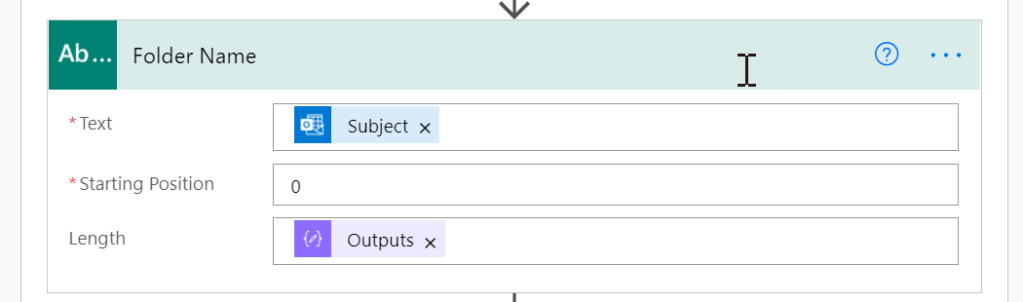
Here we populate in the Subject from the original email, the starting point of 0 and then the index value we calculated from the Compose step previously. This generates our Folder Name for us. Now we need to check for the folder and create the file in OneDrive:
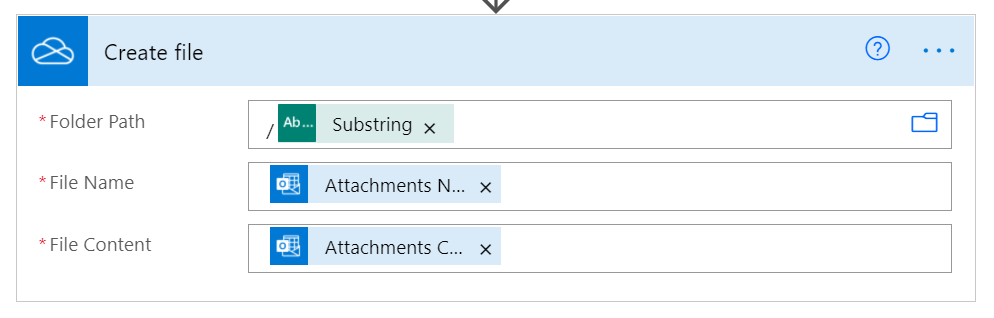
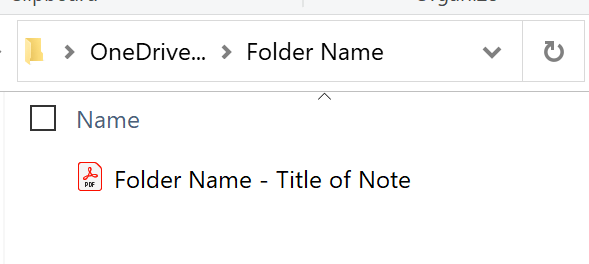
Note that this will only work at the Root level of OneDrive. We set the folder path to be the name we parsed from the substring action, the file name will be the name of the attachment (or whatever makes the most sense to you) and the file content will be the Attachment Content. So now if the folder already exists, the file will be created there. If not, a new folder will be created and the file stored there. Here’s what that looks like in OneDrive based on the example we’ve been working with:
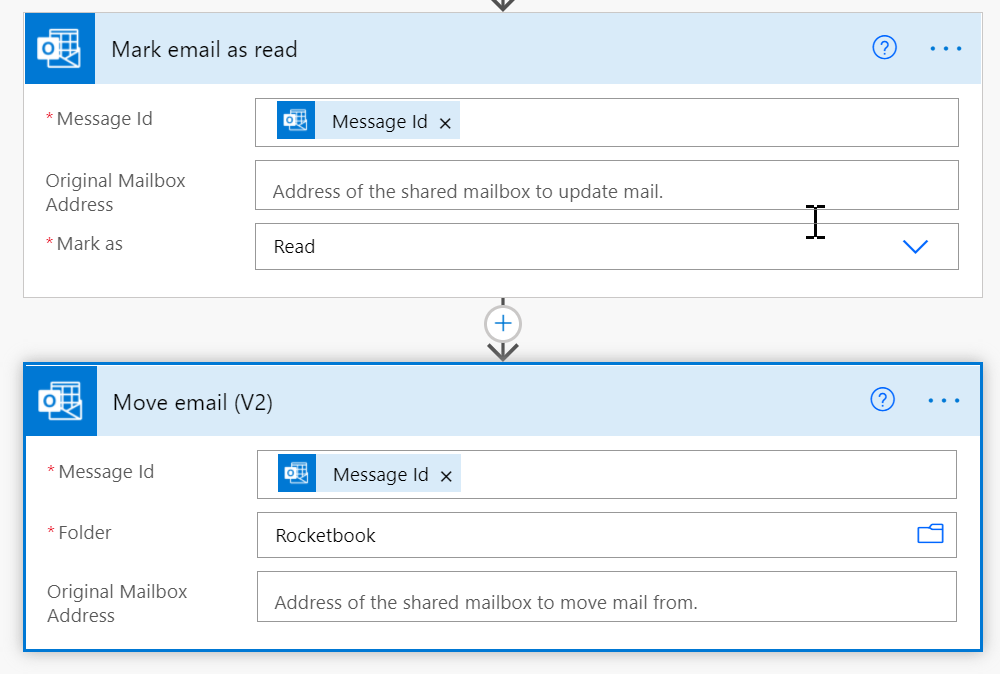
Finally, I like to set the received email to read and move it to a designated folder, in case I need to reference it later:
There you have it! Now I can keep all of my Rocketbook notes organised by folder name dynamically, without having to set up multiple destinations on my Rocketbook app!

Hi, do you if this process would also work with gmail (or only outlook). Many thanks
LikeLike
Yes! Rocketbook already has built in connections to gmail, so you would just switch it out!
LikeLike