

Next up, we need to find the right home for the CoE Starter Kit. There are a few simple rules we need to follow to ensure we provide the most optimal environment for the toolkit. 🔧🔨
Environment Requirements
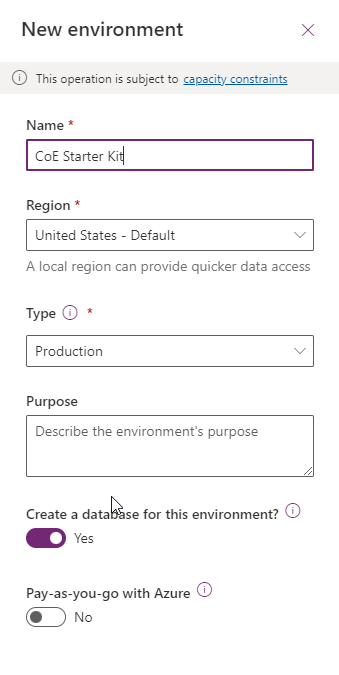
With support for the Teams version of the CoE no longer being supported or improved upon, I highly recommend installing the Production version of the toolkit. It’s considered best practice to place the CoE in it’s own special environment. The CoE toolkit will need to be installed into a Production Environment and must be set up with a Database but don’t include the sample apps and datasets. It is also recommended to not restrict access by security group either.
Set up your DLPs
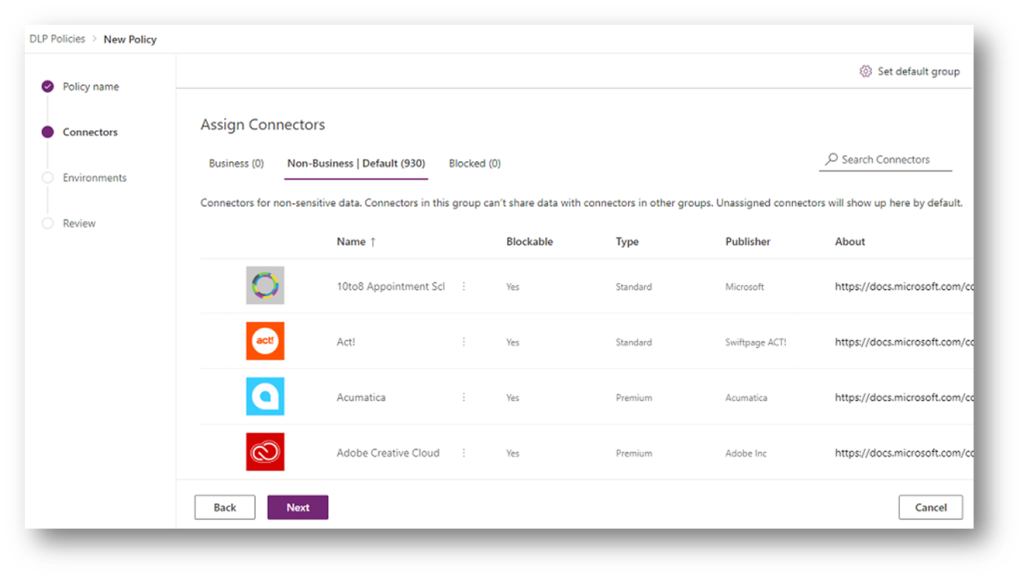
If you have DLPs set up in your tenant, you need to ensure the environment has access to the following connectors together:
- Approvals
- HTTP
- HTTP with Azure AD
- Microsoft Dataverse
- Microsoft Dataverse (legacy)
- Microsoft Teams
- Office 365 Groups
- Office 365 Outlook
- Office 365 Users
- Power Apps for Admins
- Power Apps for Makers
- Power Automate for Admins
- Power Automate Management
- Power Platform for Admins
- RSS
- SharePoint
Set up your Connectors
Our next step in getting your environment set up is getting your connectors together. This can be done at the import stage or prior to, but should be created with your previously set up service user. You can set these up by going to make.powerautomate.com, selecting the environment we’re working on and going to Data > Connections > + New Connection. Here’s a handy list of connectors that are needed at the time of publishing this blog.
- Approvals
- Microsoft Dataverse
- Microsoft Dataverse (legacy)
- Microsoft Teams
- Office 365 Groups
- Office 365 Outlook
- Office 365 Users
- Power Apps for Admins
- Power Apps for Makers
- Power Automate for Admins
- Power Automate Management
- Power Platform for Admins
- RSS
- SharePoint
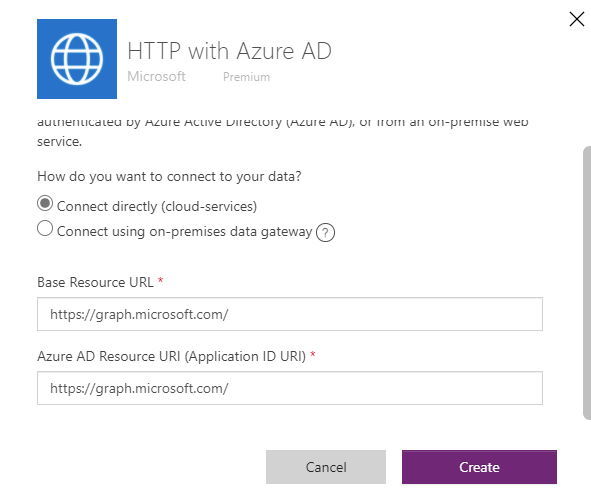
- HTTP with Azure AD
That last connector is a little tricky and isn’t immediately obvious. For 99% of people, you’ll populate in the value of https://graph.microsoft.com/ for both the Base Resource URL and the Azure AD Resource URI. If you’re tenant is on anything like GCC, GCC High or DoD, you’ll need this link to determine what values to input.
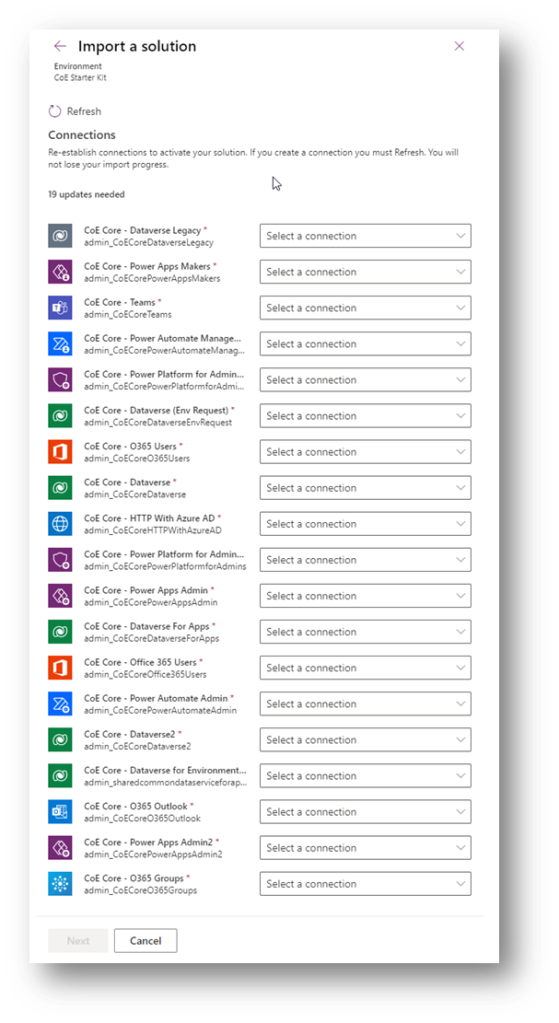
If you choose to set up the connectors at import, it will ask you to select a user to run the connection through. Just make sure to use the service user we set up in the last blog.
Installing the Creator Kit
You might read this section and think “wait a second, I am installing the CoE Starter Kit, not the Creator Kit”. Yes, however the CoE has some dependencies on the Creator Kit, so we need to install the core components of the Creator Kit first. It takes a few minutes and sets the foundation for the install of the toolkit.
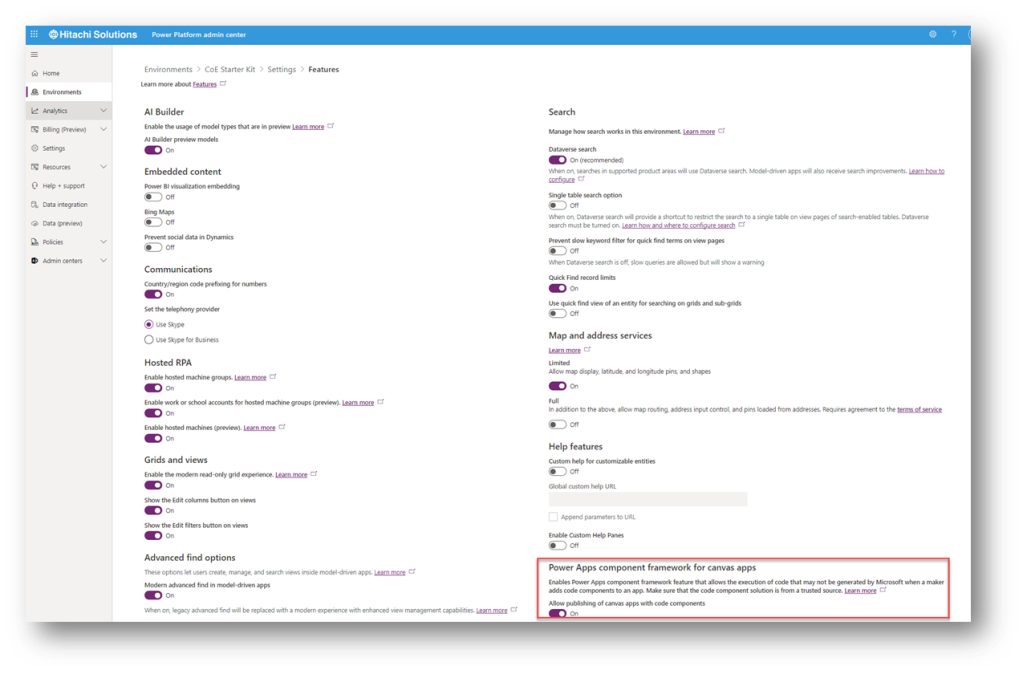
First, you will need to download the Creator Kit from here. Ensure that your environment has Power Apps code components for Canvas Apps is turned on. This can be found in Environment Settings under Features.
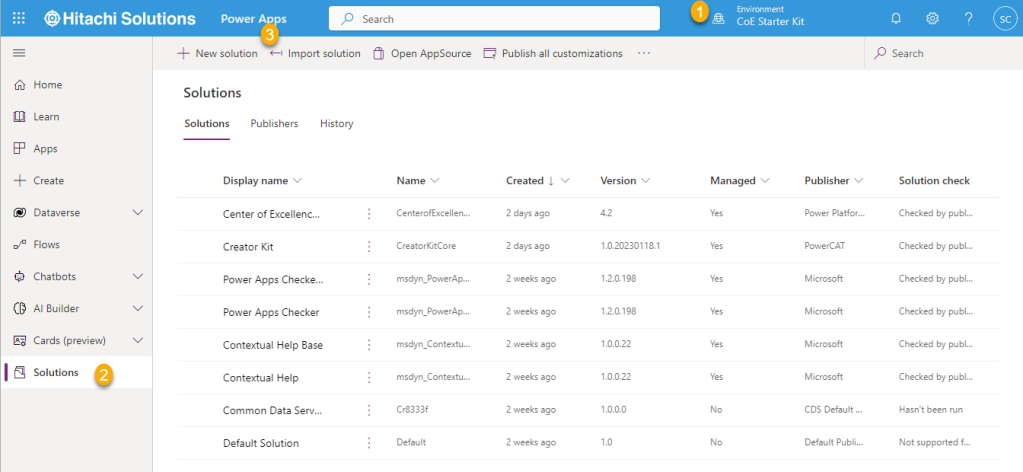
Next, you’re going to import the core solution which you have just downloaded. This can be done by navigating to make.powerapps.com, selecting your CoE environment, clicking Solutions on the left and then clicking Import, then follow the prompts.
This may take a few minutes to complete, so use this as an excuse to get up and grab a beverage of your choice ☕🥤
Now you have the foundation of the house laid, we can get started on the exciting part – installing the CoE Starter Kit!
